
Mastering Domain Name Transfers: Your Comprehensive Guide to the Latest Policy
In the dynamic world of online presence, a domain name is more than just an address; it’s the cornerstone of your digital identity. Whether you’re a burgeoning startup, an established e-commerce giant, or an individual blogger, managing your domain effectively is paramount. This often includes the need to transfer your domain name from one registrar to another. Perhaps you’re seeking better pricing, superior customer service, more robust features, or simply consolidating your digital assets under a single provider. Whatever your motivation, understanding the domain transfer process is crucial for a smooth transition.
The landscape of domain name transfers saw significant changes recently, particularly towards the end of May, with updated policies designed to streamline the process. These new regulations, largely influenced by the Internet Corporation for Assigned Names and Numbers (ICANN), aim to make domain migration more efficient while maintaining high security standards. This article will walk you through the current, four-step process for transferring a domain name between registrars, providing you with all the necessary details to execute a successful and hassle-free transfer under the newest policy.
Understanding the Latest Domain Transfer Policy Changes
The most notable recent alteration to the domain transfer policy involves the elimination of a previously mandatory step. Historically, when you initiated a transfer, your new registrar was required to send an email to the current registrant of the domain, seeking explicit authorization before the transfer could proceed. This step, while intended as a security measure, often introduced delays and complexities, sometimes causing the transfer process to “break” temporarily at certain registrars due to technical glitches or registrant oversight.
Under the updated policy, this specific authorization email from the gaining registrar has been removed. The emphasis is now placed on the registrant’s direct interaction with their current (losing) registrar. This change is designed to expedite the transfer process, making it more intuitive and reducing friction. However, it also means that registrants must be more diligent in managing their domain settings and being responsive to communications from their existing registrar. While the goal is efficiency, some registrars have experienced temporary adjustments as they adapt their systems to the new framework, occasionally leading to minor, transient disruptions.
The Essential Four Steps to a Seamless Domain Transfer
Navigating a domain name transfer might seem daunting, but by following these four critical steps, you can ensure a successful transition for your digital asset. Each step plays a vital role in securing and validating the transfer, culminating in your domain residing with your chosen new registrar.
1. Unlocking Your Domain for Transfer
The very first prerequisite for any domain name transfer is to ensure that your domain is unlocked. This “transfer lock,” often referred to as a registrar lock or domain lock, is a crucial security feature implemented by domain registrars to prevent unauthorized transfers of your domain. Think of it as a protective seal that prevents your domain from being moved without your explicit permission.
Before you even initiate the transfer process, you must disable this transfer lock. This action is typically performed within your current domain registrar account. The exact path may vary slightly between registrars, but you’ll generally find this option within your “Domain Management,” “Security Settings,” or a similarly named section associated with the specific domain you wish to transfer. Look for an option that says “Disable Transfer Lock,” “Unlock Domain,” or “Turn Off Registrar Lock.” Once disabled, it’s a good practice to verify its status to ensure the change has been applied correctly. Some registrars might take a few minutes to process this change, so patience is key. Ensuring your domain is unlocked is a non-negotiable first step; any attempt to transfer a locked domain will be met with an automatic rejection from the new registrar.
2. Obtaining Your Domain Authorization Code (EPP Key)
Once your domain is unlocked, the next critical piece of the puzzle is the authorization code. This code, also widely known as the EPP code (Extensible Provisioning Protocol code), transfer code, or transfer key, serves as a unique password for your domain. It is domain-specific, meaning each domain name has its own distinct authorization code, making it an essential security measure against unauthorized transfers. This code acts as proof of ownership and is mandated by ICANN, the governing body for domain names, to ensure that only the legitimate domain owner can initiate a transfer.
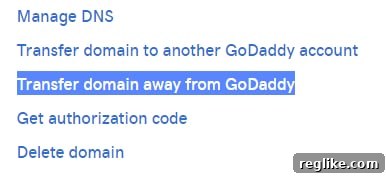
Most domain registrars provide straightforward methods for obtaining this code. You will typically find it displayed prominently within your domain management area, often alongside your domain’s details or within a dedicated “Transfer Out” or “Security” section. Some registrars might offer the option to have the code emailed to the administrative contact associated with the domain name. For instance, if you’re transferring a domain away from GoDaddy, you would typically navigate to your domain portfolio, select the domain, and then click on “Transfer domain away from GoDaddy” to initiate the process and retrieve your authorization code. It’s imperative to copy this code accurately, as it is often case-sensitive and can contain a mix of letters, numbers, and special characters. Be sure to keep this code secure, as anyone with access to it could potentially initiate a transfer of your domain.
If you encounter difficulty finding your EPP code, check your registrar’s help documentation or contact their customer support. They can guide you to its location or, in some cases, manually provide it after verifying your identity.
3. Initiating the Transfer with Your New Registrar
With your domain unlocked and your authorization code in hand, you’re ready to proceed to the gaining registrar – the company to which you wish to transfer your domain. The process here is typically intuitive and designed to guide you through each step.
You will begin by visiting the website of your chosen new domain registrar. Look for a section dedicated to domain transfers, usually labeled “Transfer Domain,” “Domain Transfer In,” or similar. You will then be prompted to enter the domain name you wish to transfer. After entering the domain, the system will typically ask for the authorization code (EPP code) that you obtained from your current registrar. This is where the security and validity of your EPP code come into play. Once you submit the code, the new registrar will initiate the transfer request with the central domain registry (like Verisign for .com and .net domains) and your current registrar.
During this stage, you will also typically be asked to review and confirm your contact information, select a registration period for your domain with the new registrar (often one year is added to your existing registration time), and decide on any additional services like WHOIS privacy protection, email hosting, or web hosting packages. It’s an excellent opportunity to consolidate services or opt for better features offered by your new provider. Make sure to carefully review the pricing and terms of service before finalizing your order and making payment. Once the payment is complete and the transfer request is submitted, the new registrar will formally request the domain transfer on your behalf.
4. Receiving Communication from Your Old Domain Name Registrar
The final stage of the domain transfer process involves communication from your current (losing) domain name registrar. After the new registrar has initiated the transfer request, your old registrar will receive a notification of this request. In response, they are obligated to send you, the domain registrant, an email notification to confirm that a transfer is in progress for your domain.
This email serves as a final alert and typically provides you with a few options. By default, if you take no action, the domain transfer will proceed automatically within five calendar days. This 5-day period is a standard practice, allowing a brief window for the registrant to review the transfer request and ensure it is legitimate. It acts as a final safeguard against unauthorized transfers, even if someone managed to obtain your EPP code.
However, many registrars also offer an option to expedite the transfer. Within the email, you might find a link or instructions to “Approve Transfer” or “Expedite Transfer.” Clicking this link and confirming your intent can significantly shorten the transfer duration, often reducing it from five days to just a few hours or even minutes. This can be particularly useful if you’re in a hurry to complete the migration. Conversely, the email will also provide an option to “Deny Transfer” or “Cancel Transfer” if you did not initiate it or have changed your mind. It’s crucial to monitor your email inbox (including spam or junk folders) during this period to ensure you receive and act on this important communication, especially if you wish to expedite the process.
Why Consider Transferring Your Domain Name?
There are numerous compelling reasons why a domain owner might choose to transfer their domain name. While the process requires a few steps, the benefits often outweigh the temporary effort:
- Cost Savings: Different registrars offer varying pricing structures for renewals and initial registrations. Transferring can lead to significant long-term savings.
- Improved Customer Service: Not all registrars are created equal when it comes to support. If you’ve had negative experiences with your current provider, a transfer can connect you with a registrar known for excellent customer support.
- Consolidation of Services: Managing multiple domains and associated services (hosting, email) across different registrars can be cumbersome. Transferring allows you to consolidate everything under one roof, simplifying billing and management.
- Better Features and User Interface: Some registrars offer more advanced DNS management tools, robust security features, or simply a more intuitive control panel experience.
- Enhanced Security: While all registrars must adhere to ICANN security standards, some go above and beyond with additional layers of protection like advanced two-factor authentication or proactive security monitoring.
Critical Considerations Before Starting Your Domain Transfer
Before you embark on the domain transfer journey, a few critical checks can prevent potential headaches and ensure a smooth process:
- Check Expiration Date: Avoid transferring a domain too close to its expiration date. ICANN rules typically state that domains cannot be transferred within 60 days of their initial registration or a previous transfer, and some registrars have specific policies about transfers close to expiry. It’s generally recommended to initiate a transfer at least 15-30 days before your domain is set to expire.
- Update Contact Information: Ensure that the administrative contact email address associated with your domain is current and accessible. This is the email address that will receive critical notifications, including the transfer authorization email from your current registrar.
- Review DNS Settings: If your domain is actively linked to a website or email service, make a note of your current DNS (Domain Name System) settings, including nameservers and any custom A records, CNAMEs, or MX records. While your DNS settings usually transfer with the domain, it’s wise to have a backup in case you need to reconfigure them at the new registrar to avoid downtime.
- Associated Services: Understand that transferring your domain only moves the domain name itself. Services like web hosting, email hosting, or SSL certificates are typically separate and will need to be reconfigured or migrated independently to ensure continuous service.
Navigating Potential Hurdles and Troubleshooting Common Domain Transfer Issues
While the goal is a seamless process, sometimes issues can arise during a domain transfer. Knowing how to troubleshoot common problems can save you time and frustration:
- Transfer Lock Won’t Disable: If you’re having trouble unlocking your domain, double-check that you’re logged into the correct account and looking in the right section. If issues persist, contact your current registrar’s support immediately.
- Authorization Code Not Received or Invalid: Ensure you requested the EPP code correctly. Check your spam folder if it was supposed to be emailed. If the code is rejected, verify that you copied it exactly, paying attention to case sensitivity. Codes can also expire, so request a new one if necessary.
- Transfer Rejection: Your transfer might be rejected for several reasons, such as the domain being locked, an invalid authorization code, or the domain being within the 60-day lock period after registration or a previous transfer. The rejection notice will usually specify the reason, allowing you to rectify the issue.
- Email Issues: If you’re not receiving emails from your registrars (especially the one from your old registrar about expediting or denying the transfer), check your spam/junk folders. Also, confirm that your domain’s administrative contact email address is correct and actively monitored.
- Slow Transfer: While the new policy aims for speed, some transfers might still take the full 5 days, especially if you don’t use the expedite option. If it takes longer without explanation, contact both registrars’ support teams.
Ensuring Security Throughout the Domain Transfer Process
Security should always be a top priority when dealing with your domain name. During a transfer, this vigilance is even more crucial:
- Strong Passwords: Ensure both your current and new registrar accounts are protected by strong, unique passwords.
- Two-Factor Authentication (2FA): Enable 2FA on all your registrar accounts. This adds an extra layer of security, making it significantly harder for unauthorized individuals to access your account even if they have your password.
- Keep Contact Information Updated: Your domain’s administrative contact email is vital for transfer notifications. Regularly verify that it is accurate and secure.
- Beware of Phishing: Be wary of suspicious emails or communications claiming to be from your registrar, especially those asking for personal information or your authorization code. Always verify the sender’s legitimacy.
Conclusion: A Smoother Path to Domain Management
The updated domain transfer policy has streamlined a crucial aspect of online asset management, making the process generally quicker and more registrant-centric. By understanding these four core steps – unlocking your domain, obtaining the authorization code, initiating the transfer with your new registrar, and responding to your old registrar’s communication – you can navigate the process with confidence.
A successful domain transfer empowers you to choose the best provider for your needs, ensuring optimal performance, cost-efficiency, and peace of mind for your digital presence. While initial changes may cause minor adjustments, the long-term benefits of a more efficient system are clear. Follow this guide, stay vigilant with security, and you’ll find transferring your domain name a straightforward path to enhanced online management.