
Create a Custom Domain Search Feature with GoDaddy API, PHP, and HTML
Ready to embark on a coding adventure? In this tutorial, we’ll guide you through building a custom domain search feature using PHP, HTML, and the powerful GoDaddy Application Programming Interface (API). This project is perfect for domain investors and developers looking to automate domain availability checks.
Prerequisites
Before we dive in, ensure you have the following:
- A web hosting environment or a local development environment (preferably Linux).
- A GoDaddy Developer account.
- Your GoDaddy API credentials (API Key and Secret).
- A text editor (e.g., Notepad++, Sublime Text, VS Code).
If you’re having trouble setting up or logging into your GoDaddy Developer account, refer to GoDaddy’s official documentation or support resources.
It’s also beneficial to have a basic understanding of how to use PHP cURL to interact with APIs. This tutorial will provide guidance, but prior knowledge will be helpful.
Note: This tutorial demonstrates a procedural approach to keep it accessible for beginners. While object-oriented programming is generally recommended for larger projects, we’ll focus on a straightforward method for this domain search feature.
Step 1: Create the Domain Search Form (HTML and PHP)
First, open your text editor and create a new PHP file named dnsearch.php. This file will house both the HTML form and the PHP logic.
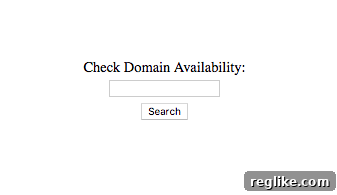
We’ll start by creating an HTML5 form with some inline CSS for basic styling (although external CSS is generally preferred for larger projects). This form will allow users to enter a domain name and submit it for availability checking.
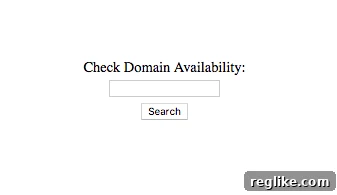
Within the HTML code, pay attention to the PHP variables $msg and $_POST['domain'].
$msg: This variable will hold messages to display to the user, such as success or error messages after a search.$_POST['domain']: This variable captures the domain name entered by the user in the form field.
The @ symbol before $_POST['domain'] suppresses any potential errors if the form hasn’t been submitted yet, while still displaying the entered domain name after submission.
Step 2: Implement Domain Sanitization and Validation (PHP)
Disclaimer: This tutorial provides a basic example and is not intended for production environments without further security enhancements. Always prioritize security best practices.
Now, let’s add the PHP logic to sanitize and validate the domain name entered by the user. This is crucial to prevent security vulnerabilities and ensure the data we send to the GoDaddy API is clean and valid.
First, initialize an empty $msg variable. This will hold our messages to the user.
Next, use an if statement to check if the form has been submitted by checking if the submit button has been pressed.
Inside the if statement, set a default error message using the $msg variable.
Use PHP’s built-in functions like str_replace and trim to clean the $_POST['domain'] form field. Remove any “http://”, “www.”, or other unwanted characters.
Employ the filter_var function with the FILTER_SANITIZE_URL filter to further sanitize the input and ensure it’s a valid URL format.
Important: Always sanitize and validate user input to mitigate the risk of SQL injection and cross-site scripting (XSS) attacks.
Our goal here is to extract just the domain name and top-level domain (TLD) – for example, “example.com” instead of “http://www.example.com”.

Step 3: Execute the Domain Search Using the GoDaddy API (PHP)
Now, it’s time to interact with the GoDaddy API to check the availability of the domain. Before making the API call, use another if statement to confirm that a domain name still exists after the sanitization and validation steps.
Within this if statement, assume that the domain has been successfully sanitized and validated, and is now ready to be sent to the GoDaddy API.
We won’t delve into every detail of making a GoDaddy API call using PHP. For a more in-depth explanation, refer to the Getting Started With GoDaddy API Using PHP tutorial.
In essence, you’ll need to define $url and $header variables. The $url variable will contain the full path to the GoDaddy API endpoint, while the $header variable will hold your API credentials (API Key and Secret). Consult the GoDaddy API documentation for the correct endpoint and header format.
Once these variables are defined, execute the GoDaddy API call using PHP’s built-in cURL library.
To capture the response from the API call, define a $response variable and set its value to the result of the curl_exec function. Then, close the cURL connection using curl_close.
Next, define a $dn variable to decode the JSON response received from the GoDaddy API. Use PHP’s json_decode function to parse the JSON data into a PHP array.

Step 4: Handle API Errors and Display Results (PHP)
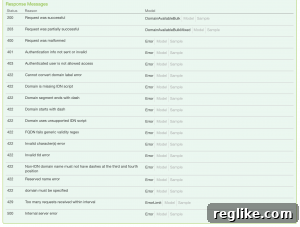
Before displaying the results to the user, implement error handling. Use an if statement to check if the $dn array contains a “code” key. This indicates that an error occurred during the API call.
If $dn['code'] exists, display the error message to the user, perhaps wrapped in HTML
tags.
Refer to the GoDaddy API documentation to understand the different error codes that can be returned by the /v1/domains/available endpoint.
If $dn['code'] does NOT exist, meaning no error occurred, proceed to check the $dn['available'] value. This indicates whether the domain is available for registration.
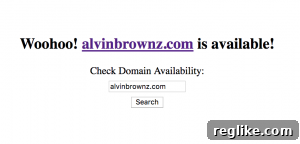
Use another if statement to check if $dn['available'] is equal to 'true'. If it is, the domain is available!
Inside this if statement, set the $msg variable to a congratulatory message, perhaps including a link to GoDaddy where the user can register the domain.
In the else block of the same if statement, set the $msg variable to a message indicating that the domain is already registered and unavailable.
Congratulations! You’ve successfully built a domain availability checker using the GoDaddy API and PHP.

Step 5: Testing and Implementation
If you are new to coding, the information above can be overwhelming. But now it’s time to put your code to the test!
Download, extract, and save the dnsearch.php file to a web-accessible directory on your server. Then, open the file in your web browser by navigating to the appropriate URL (e.g., http://localhost/dnsearch.php or http://yourdomain.com/dnsearch.php).
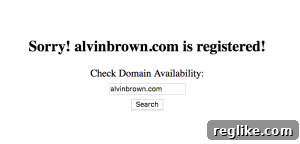
Try searching for both a domain that you know is available and a domain that you know is already registered.
The available domain should display a message similar to this:
The registered domain should display a message similar to this:
Conclusion
You’ve now created your own custom domain availability search feature using the GoDaddy API. This is just the beginning of what you can achieve with the GoDaddy API.
This tutorial is designed to empower you to become more effective and efficient in your domain investing endeavors by integrating, automating, and developing tools tailored to your needs.
Even though the concepts presented in this tutorial are straightforward, you can leverage them to address more complex technical challenges in the domain investing world.
For instance, you can adapt this code to automate checks on a list of expiring domain auctions that you didn’t win. This could help you identify valuable domains that become available for hand registration.
Regardless of your technical background, we encourage you to embrace the challenge and expand your skillset.
Please feel free to ask questions, leave comments, and suggest ideas for future tutorials that utilize the GoDaddy API.