Park your names on Mailbox Park (in bulk) — How to
The simple process to point your mail to Mailbox Park…if you use GoDaddy.
Earlier this month I interviewed Greg Kraios on the DNW Podcast.
Kraios is the founder of Mailbox Park, which is sort of like a domain name parking service for your domains’ email. You point your domains’ MX records to Mailbox Park and they pay you for each commercial email your domain names receive.
Since adding a couple dozen domains to the system a few weeks ago, I’ve continually been surprised by which domain names receive email and the contents of that email. So today I added a couple hundred more domains to the system.
Changing MX records on your domains isn’t that easy the first time. But it’s not hard once you get the hang of it. That’s especially the case if your domains are at GoDaddy since of its DNS Templates tool. Thanks to this tool, I was able to change the nameservers and MX records for these domains and complete the entire email parking process in under five minutes. Here’s how to do it:
Step 1: Find out the IP address for your parked domain names
When you park domain names with traditional domain parking firms, you just change your nameservers. With Mailbox Park you want to split your traffic so that the web traffic goes to your regular parking firm and your email goes to MailBox park.
Depending on your parking firm, you can easily do this by creating a record to point your web traffic to an IP address instead of a NameServer.
This is pretty easy with domains parked at Uniregistry since, at least in my case, they all have the same IP address. To quickly figure out if this is the case for you, run your domains through this Domain-to-IP-converter.
Step 2: Create a DNS template at GoDaddy
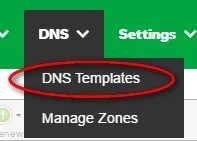
GoDaddy lets you create DNS templates that can be applied to multiple domain names. Just click the drop down within the Domain Manager:
Click on “Add” to created your template. This is what you’ll want your template to look like:
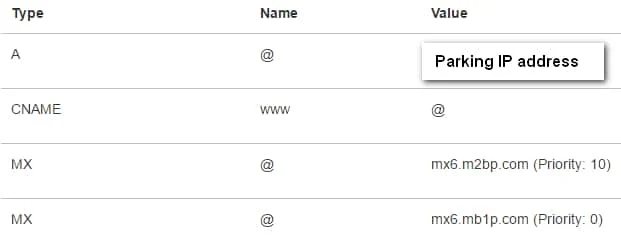
The IP address for your A record ought to be the IP address you got when you looked it up in step 1. The MX records are kind of like “nameservers for email.” UPDATE: it turns out everyone gets unique MX addresses, so be sure to use the ones in your Mailbox Park account.]
Step 3: Change your domains’ nameservers to GoDaddy’s default nameservers
Since your domains are right now pointing to a parking firm, you need to change the nameservers to GoDaddy’s default servers so that the DNS template you created will work. This means your domains will point to GoDaddy’s holding pages, but only temporarily.
Changing the name servers is a simple bulk operation within GoDaddy’s account manager. Just select the names, click the Nameservers icon, and choose “Standard”.
Step 4: Apply the DNS template to the domains.
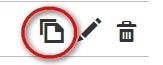
Now go back to the DNS templates. Click the icon on the left next to your template:
Copy and paste your list of domains into the field and submit. This will apply the DNS template to each of the domain names.
If you want to verify if worked, check your MX records with this tool.
Step 5: Make sure you add your domains to Mailbox Park
This step is straight-forward.
A couple cautions…
Your parking firm might use multiple IP addresses for your domains, which will complicate this process.
It’s also possible that your parking firm will not support using IP addresses via A records and might change nameservers from time-to-time.